NOTE: A Premium License or higher is required to edit or create Survey Forms.
WPrequal’s Survey Form Builder has changed the way you can interact with your users. You now have the ability to create unlimited Survey Forms.
There are 2 ways to get started with a custom Survey Form.
- Start from a pre-built template
- Start from scratch
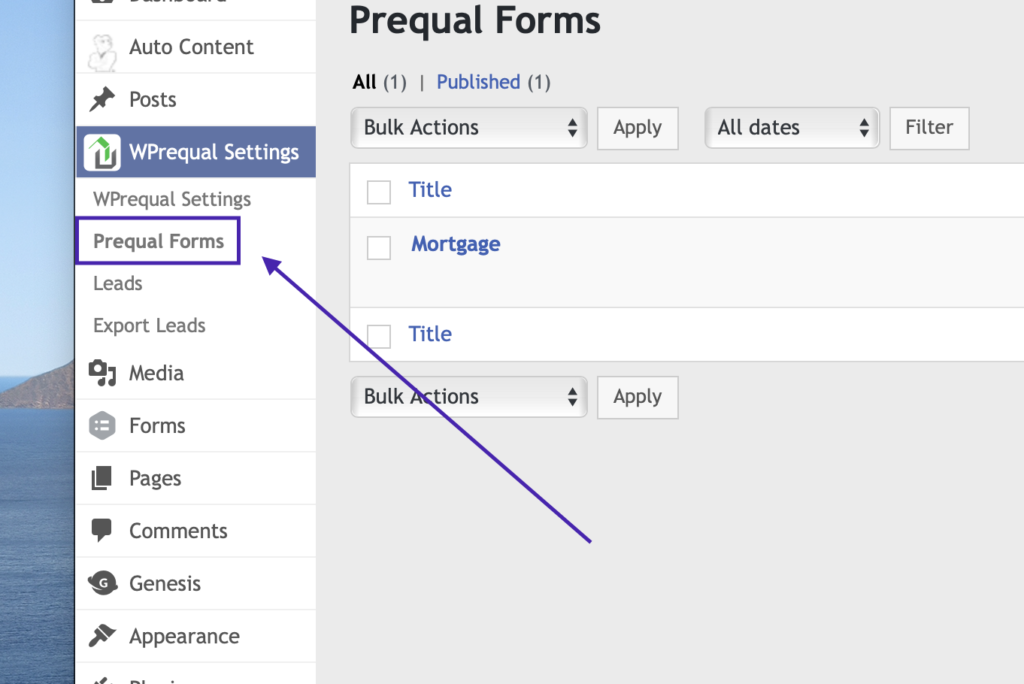
First let’s login to our website. Then navigate to WP Admin > WPrequal Settings > Survey Forms

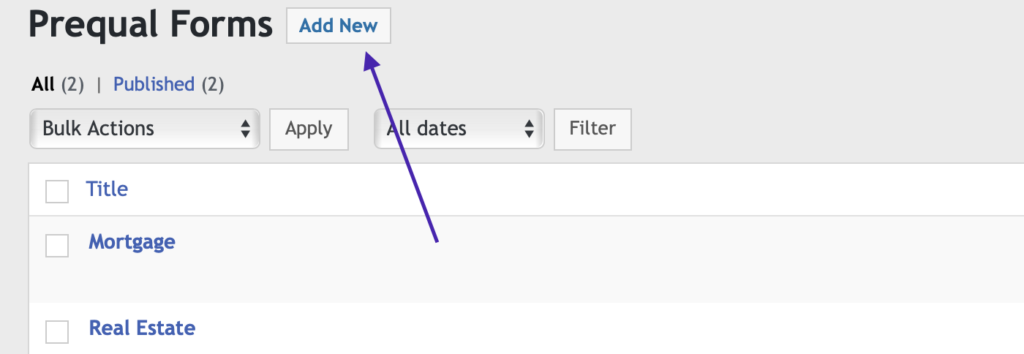
Click Add New

Type in you Prequal Form title.
Start from a pre-built template
Starting from a pre-built template is very easy. WPrequal has included Survey Form templates for mortgage and real estate.
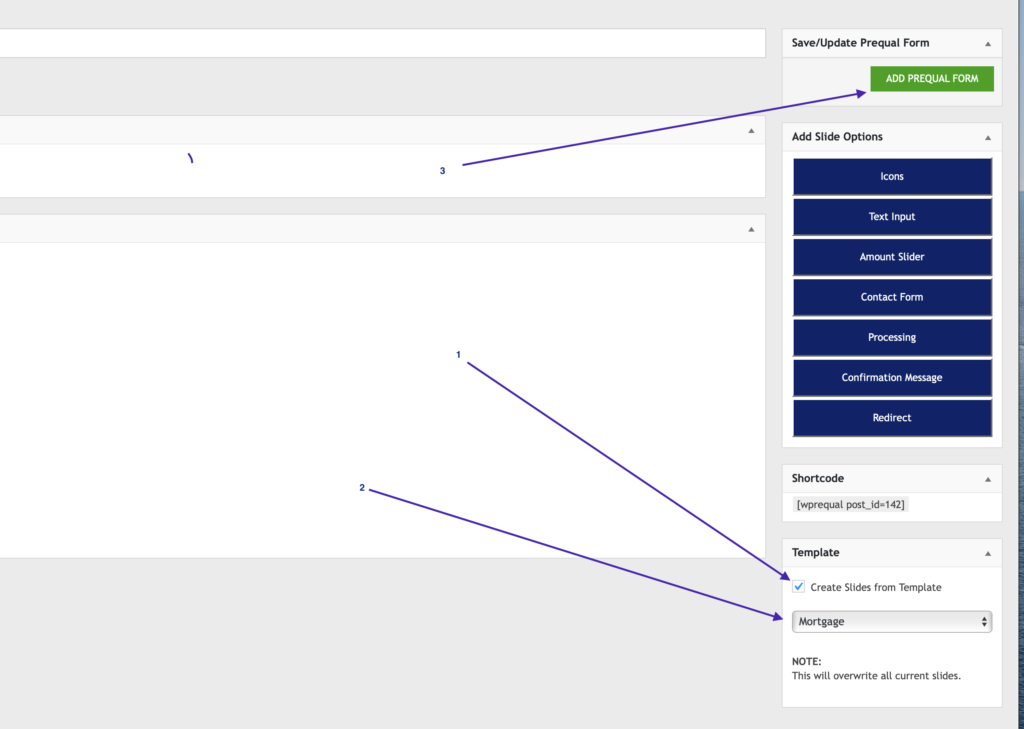
- Check Create Slide from Template
- Select the template you want to use
- Click Add Survey Form

Once the page reloads, you will see the pre-populated slides. You can edit, delete, reorder, and add slides to create the perfect Survey Form.
Start from scratch
To start from scratch. Skip the steps above.
Adding Slides
To add slides use the Add Slide Options buttons on the right side of the screen.

What does each slide option do?
- Icons – Displays an icon for each choice on the slide.
- Text Input – A form input to allow the user to type in an answer.
- Amount Slider – A range slider to enter an amount.
- Contact Form – A contact form to collect the users contact information.
- Processing – A slide to let the user know the contact information is being saved.
- Confirmation Message – A message to tell the user the form is complete.
- Redirect – Redirects the user to another URL. This page can be on your website, or any other website.
Add as many slides as you desire. Keep in mind, all Survey Forms should end with a contact form, processing, then a confirmation message or redirect.
