Using a custom contact form in a survey can be accomplished in a few easy steps.
NOTE: Please update your website to use the latest version of WPrequal to take advantage of all the features.
Follow These Steps
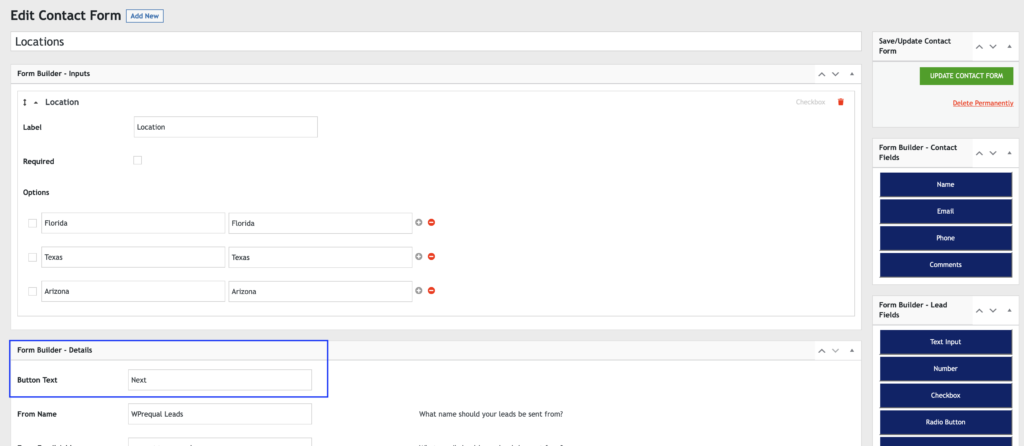
- Create a contact form that includes the desired fields
- Set the contact form button text (i.e. Next >)
- Save Changes
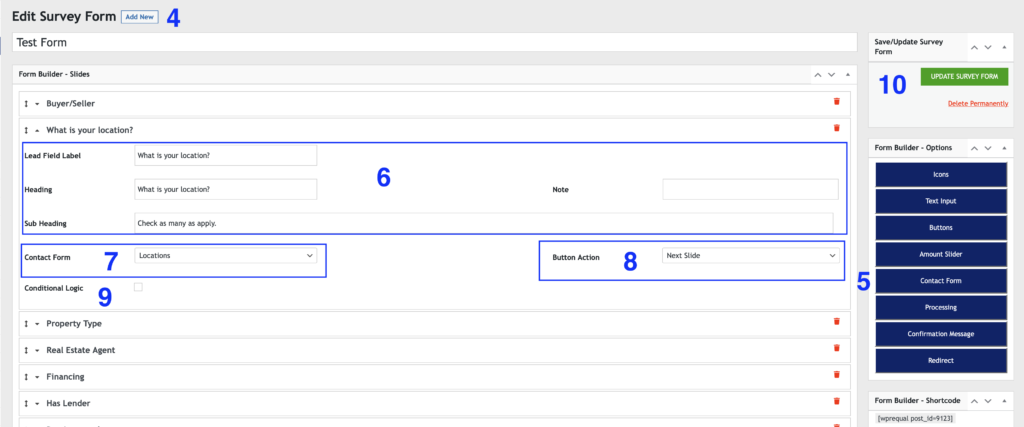
- Create a new survey form or edit an existing survey form
- Add a contact form slide to your survey form
- Add a label, heading, sub-heading and note as desired to the contact form slide
- Select a custom contact form for you slide
- Set the form action to “Next Slide”
- Add conditional logic(optional)
- Save Changes
Creating the Contact Form
Follow steps 1-3 to create a custom contact form.
Add Your Custom Contact Form to Your Survey
Follow steps 4-10 to add the contact form to your survey.
Form Example
[wprequal post_id=9123]